Gorilla Glue Wall Repair tv commercials
TV spots
TV commercials Gorilla Glue Wall Repair

Advertisers
Advertisers of commercials featuring Gorilla Glue Wall Repair
Agenices
Agencies worked with Gorilla Glue Wall Repair
Empower
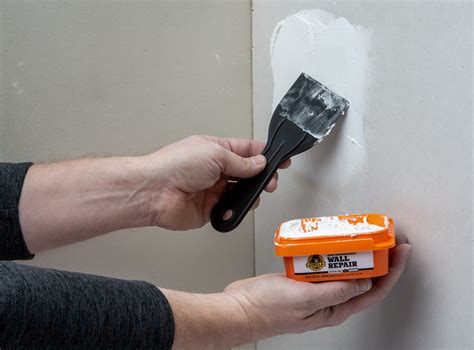
What is Gorilla Glue Wall Repair?

Title: Gorilla Glue Wall Repair for a Seamless Finish
Introduction:When it comes to home maintenance and repairs, having the right tools and materials can make all the difference. One such versatile product that has gained popularity in recent years is Gorilla Glue. Known for its incredible bonding strength, Gorilla Glue can also be used for wall repair, providing a seamless finish. In this article, we will explore the process of using Gorilla Glue for wall repair, highlighting its benefits and offering step-by-step instructions for a successful project.
Benefits of Using Gorilla Glue for Wall Repair:1. Strong Bond: Gorilla Glue is renowned for its impressive bonding strength, making it an excellent choice for wall repairs. It creates a durable bond that holds up well over time.2. Versatility: Gorilla Glue can be used on a variety of surfaces, including drywall, plaster, wood, and more. This versatility makes it a go-to solution for many homeowners.3. Minimal Shrinkage: Unlike some adhesives, Gorilla Glue has minimal shrinkage, ensuring a seamless finish after the repair is complete.4. Water Resistance: Gorilla Glue is water-resistant, making it suitable for wall repairs in areas prone to moisture, such as bathrooms and kitchens.
Step-by-Step Guide for Gorilla Glue Wall Repair:Note: Before starting any wall repair project, make sure the surface is clean, dry, and free from any loose debris.
Step 1: Preparation- Gather the necessary materials, including Gorilla Glue, a putty knife, sandpaper, and paint that matches your wall color.- If necessary, remove any loose or damaged sections of the wall using a putty knife or sandpaper. Smooth out the area to be repaired.
Step 2: Applying Gorilla Glue- Squeeze a small amount of Gorilla Glue onto the damaged area of the wall.- Use a putty knife or a similar tool to spread the glue evenly, ensuring complete coverage over the damaged surface.- Press the glued section firmly against the wall, holding it in place for a few minutes to allow the glue to bond.
Step 3: Drying and Sanding- Leave the glued section undisturbed for at least 24 hours to allow the Gorilla Glue to fully dry and bond with the wall.- After the glue has dried, lightly sand the repaired area to create a smooth and level surface. This step ensures a seamless finish.
Step 4: Paint and Finishing Touches- Once the repaired area is sanded, clean off any dust or debris.- Apply a coat of matching paint to the repaired section, feathering it out to blend with the surrounding wall.- Let the paint dry according to the manufacturer's instructions, and apply additional coats if necessary, until the repair is completely unnoticeable.
Conclusion:Gorilla Glue is an excellent choice for wall repair due to its strong bonding properties, versatility, and minimal shrinkage. By following the step-by-step guide provided, you can effectively use Gorilla Glue to repair damaged walls, achieving a seamless finish that will leave your home looking fantastic. So, whether it's a small ding or a larger hole, consider Gorilla Glue as your go-to solution for wall repairs, saving you time, effort, and money in the process.


